|
The Tuesday Night Club Official Web Site |
The Tuesday Night Club on Tour
Irish Summer Tour 2007
19 - Killaloe to Limerick - River Shannon and Limerick Navigations, inc Ardnacrusha and Abbey River.
Click here for maps of the Killaloe to Limerick Waterway.
Monday 9th July 2007
Brian Goggin came along for the day as our negotiator with the
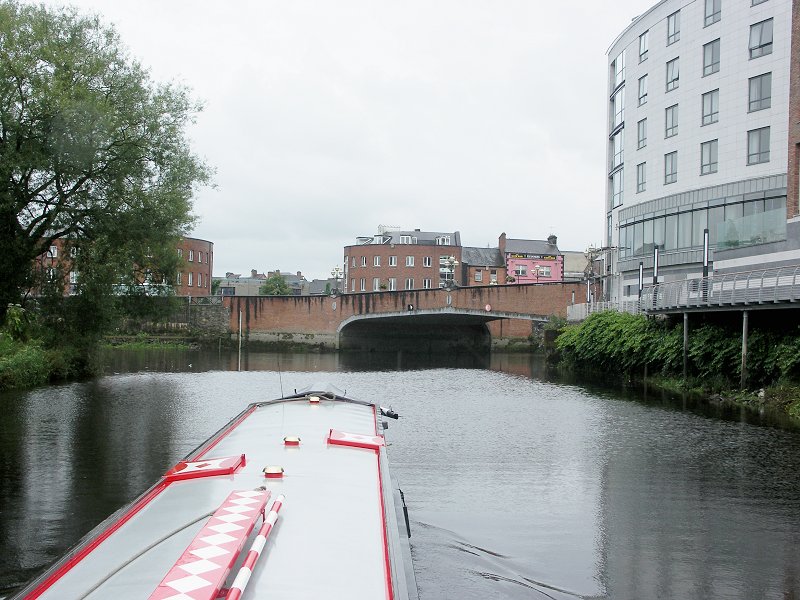
locals. Neil had booked Ardnacrusha with the ESB (Electricity Supply Board) for around 10:30, with the idea that we must leave the bottom chamber around 11:30. We set off at 08:30, there did not seem to be much of a flow through Killaloe Bridge, a good omen!
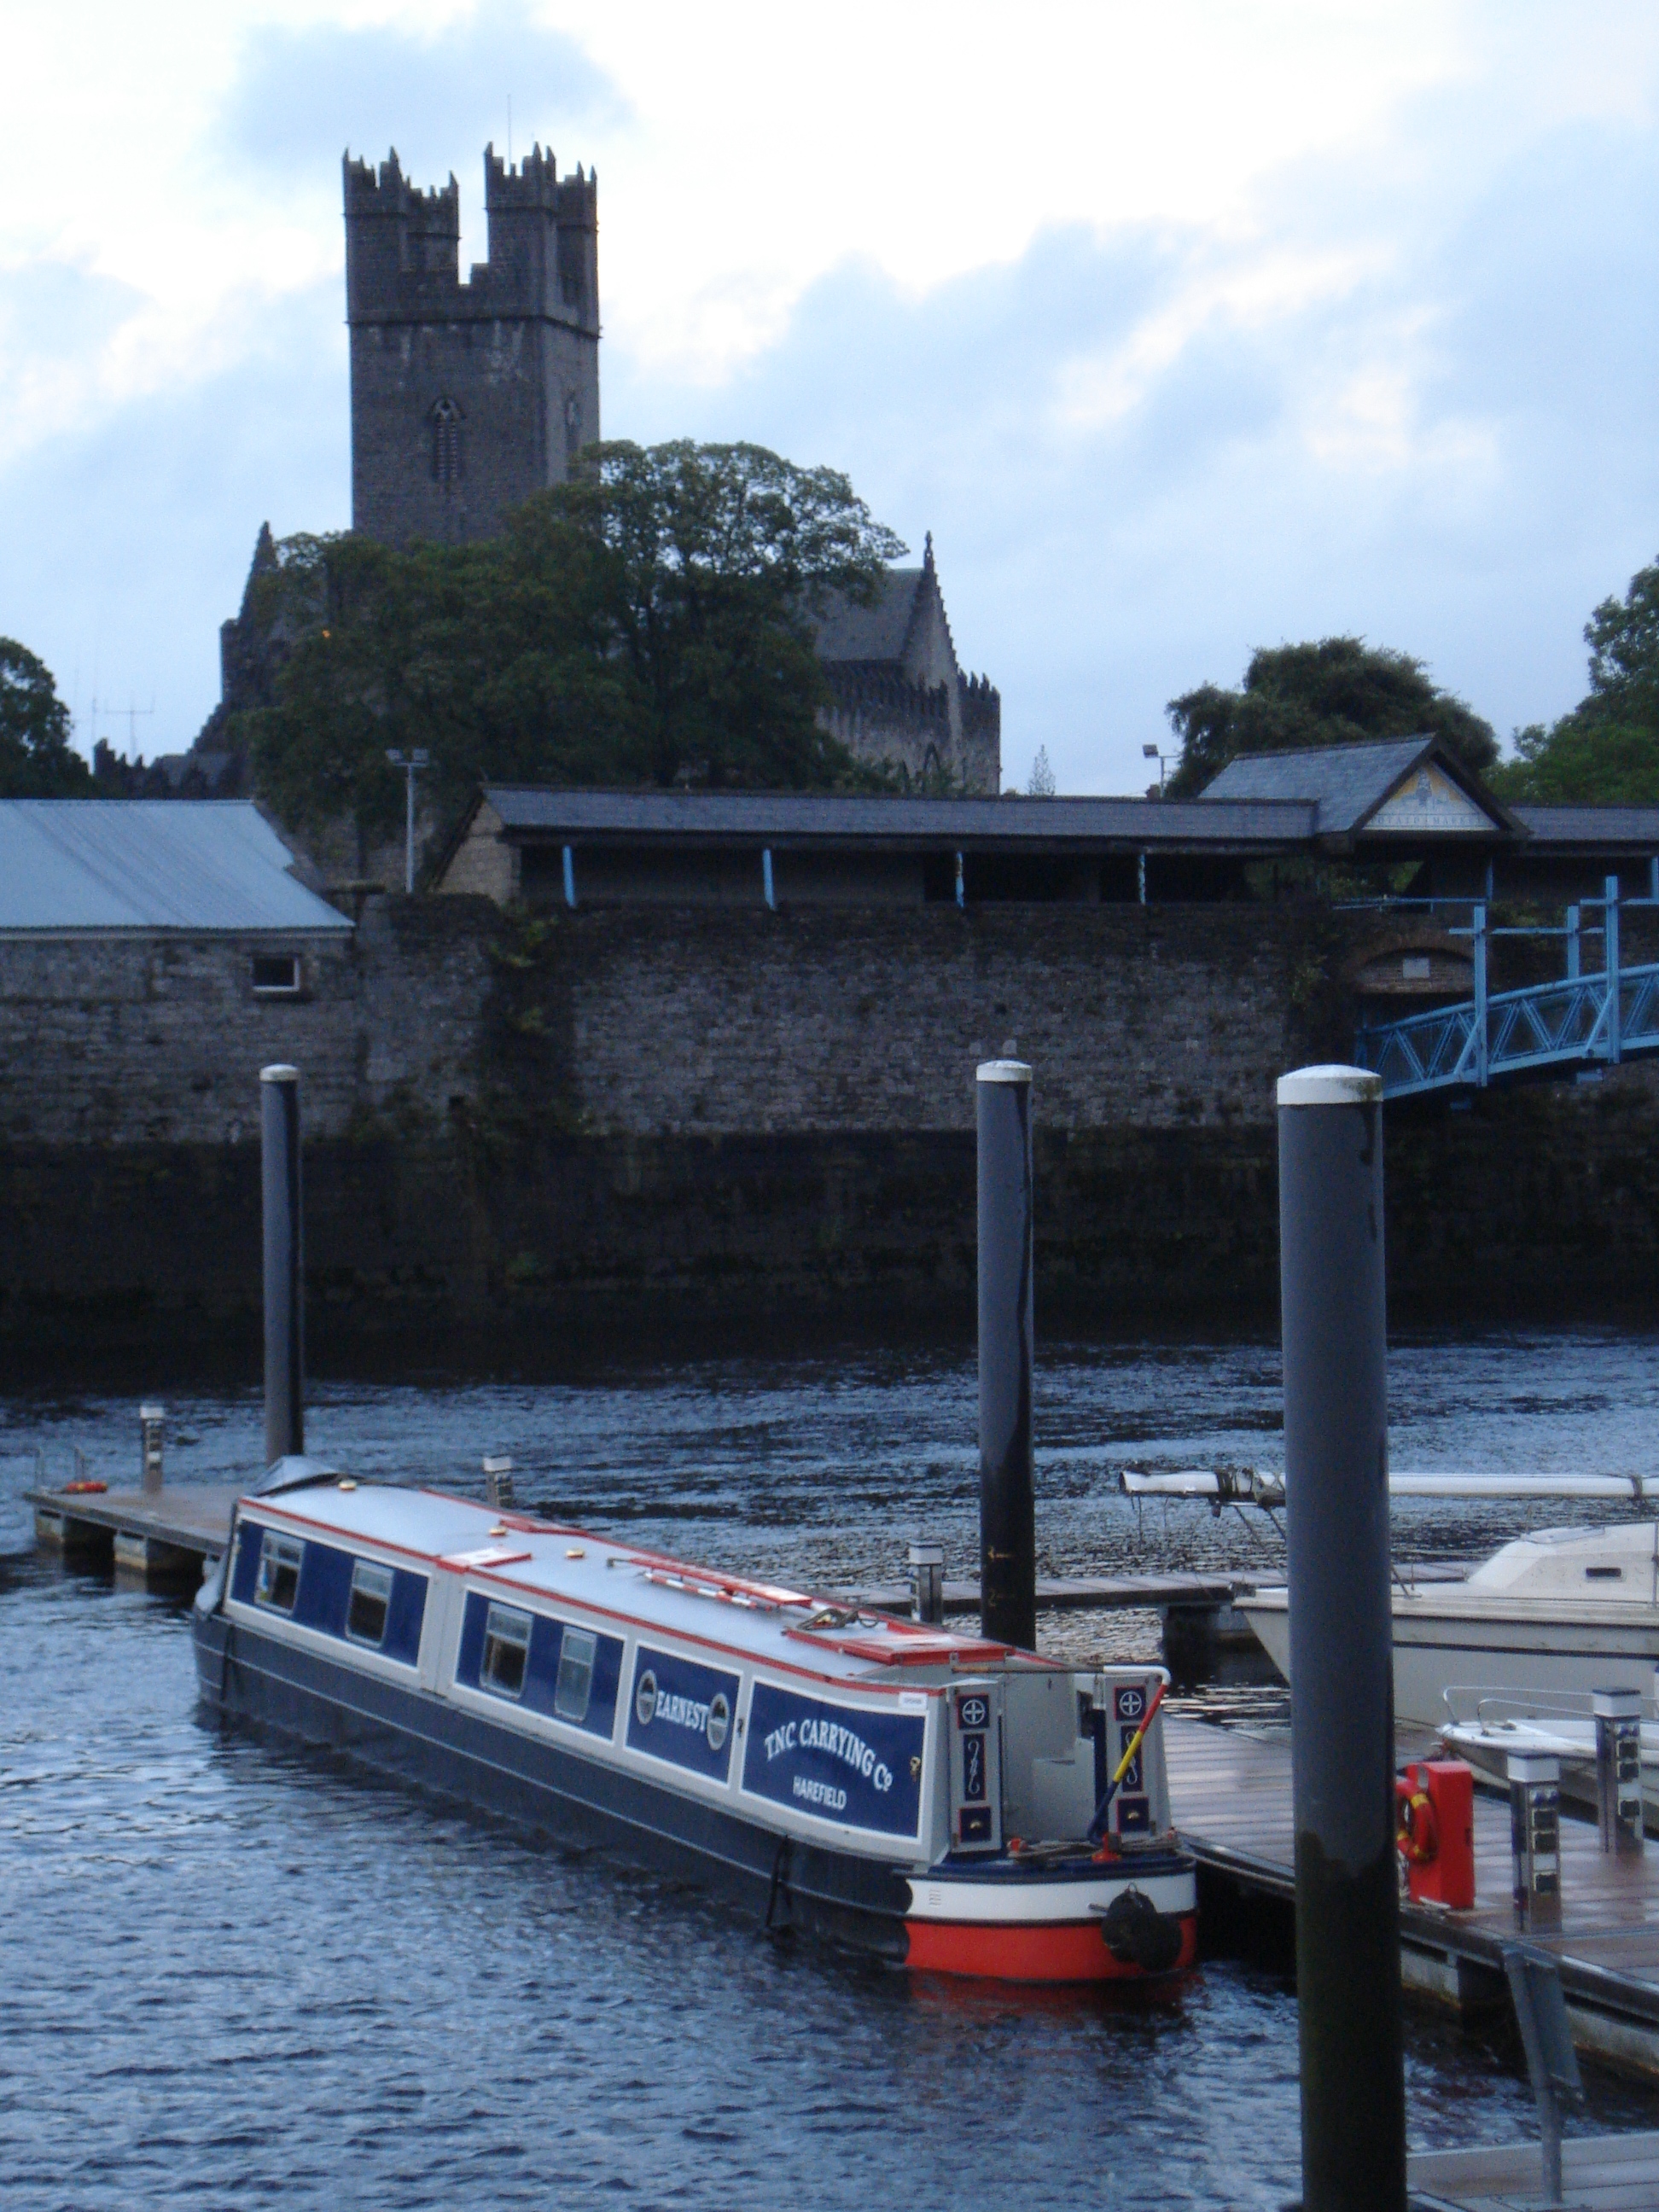
To the west below the bridge we could see Killaloe Cathedral and the other end of the remaining section of the Killaloe Canal, which hung to the side, still being used as moorings, with an outlet into the Lower Lake a few hundred yards down. On the east bank were the new pontoon visitor moorings, not yet connected up to the land. Further down this bank were a collection of boat sheds.
Soon we were out into the main body of the flooded area, now known as the Lower Lake. We got out the binoculars and managed to spot the rather discoloured navigation
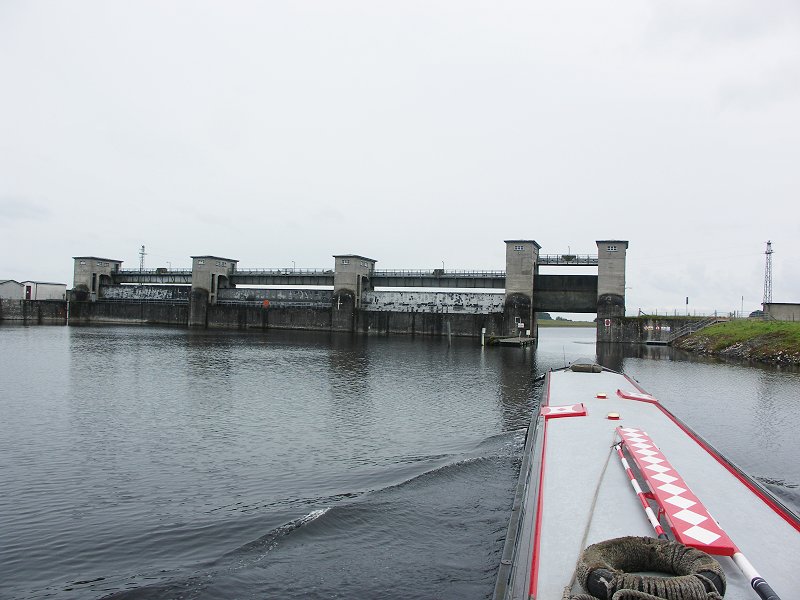
buoys. Beyond, the Parteen Villa Weir could be seen, with the Boat Pass guillotine in the "up" position. It was
relatively easy to navigate between the buoys and soon we were up to the impressive structure of the Parteen Villa Weir. The eastern side deflects a set amount of water down the bottom of the Shannon,
whereas the west side allows water into the Headrace.
At the far side of this was a single guillotine, the boat pass. Just before the boat pass was an emergency and waiting pontoon. Yet again there was not much flow through the boat pass. The Headrace is not unlike some of the East Anglian rivers and with the weir structure, reminded us of Denver Sluice. The first bridge we came to was O'Briens, this was followed by a buoyed section, protecting rocky shallows. The next bridge, Cloonlara had eel net gantries each side, the nets were pulled back to the western side. Finally the Blackwater Bridge came into view, framing the
intake sluices to Ardnacrusha Dam and the towering guillotine of the lock.
The upper gate was up and ready, so we sailed straight in. Gerry Reid, the main ESB lock keeper was about and we were soon ready, with Brian acting as rope man on the roof, using the centre rope to hold onto the series of bollards inset down the chamber side. The top guillotine soon effortlessly closed and we began the slow, gentle descent.
No words can really describe the experience,
in fact the many images barely impart the experience. One of the most impressive things when we were right down, was how when you looked up you could only see a small square of sky above! One natty feature was how the front crash board floated down with the level of the water, to fend wayward boats off the font of the chamber and the centre guillotine, once it emerged from the murky depths. Soon the centre guillotine began to raise and sunlight flooded in to the gloomy depths.
Once we were in the bottom chamber and Gerry had closed the centre gate, he
moved down to the bottom control position. The bottom lock of the staircase has the upper water level, near the top of the sides of the lock, so it was much easier to get out here. Neil did the payment to ESB, a paltry few cents, prices set many moons ago, we also got a key card for the entrance gate to the Custom House Moorings in Limerick, deposit €20.
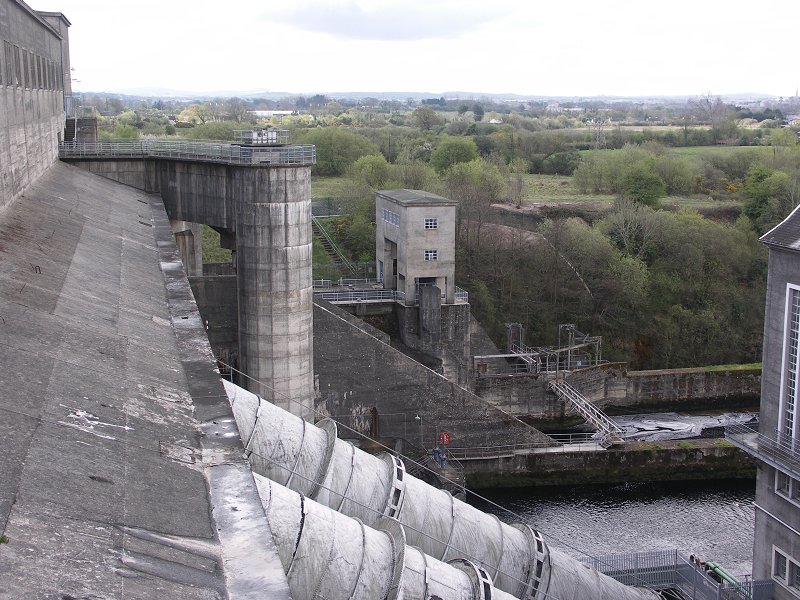
John Chapman, Brian Goggin and Martin Clark had a bit of an explore, taking many photos from on high. Gerry said that they had not been generating when we came down, due to a bucket and tree stumps being stuck in the turbine entrance screens and they had only just got the rubbish free and collected, using their "pet" M barge.
This barge sunk long ago and when the Grand Canal Co did not want to pay for its recovery, the ESB eventually did and turned it into their workboat. Gerry also said that one turbine was now running, but it did not look good for the rest of the week, three would probably be running most of the time due to there being a fair amount of water about.
Eventually we were locked down and exited the bottom chamber at 11:35. Just below the lock, in the entrance canal is a floating waiting pontoon, not long after this the canal finishes and the
navigation switches to being in the Tailrace. It all seemed a bit tame with only one turbine running, The local expert, Pat Lysight came out to meet us in his
aluminium Dory. The Tailrace is crossed by one bridge, the high Parteen Bridge. After the Headrace finishes the navigation and outflow joins the main River Shannon, which comes in from the south
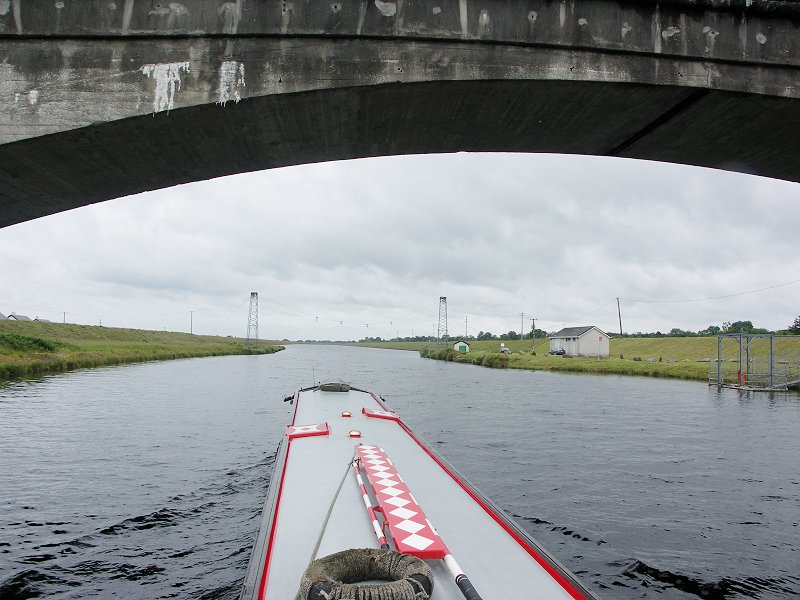
east, just after this is a buoyed section, then a railway bridge. Just before the railway bridge is an
air draught gauge and a waiting pontoon.
The centre span of the railway bridge is the navigation arch, but then the navigation (unless you are experienced, or nuts enough to go down the main Shannon River and into Limerick shooting the Thomond half tide weir and Curragour Falls!) turns sharply left (east) down the Abbey River. There is another waiting pontoon here.
Coming the back way into Limerick, housing only just becomes apparent. The first bridge in Abbey River is O'Dwyer's Bridge. This
concrete bridge had workmen, with a safety boat, working on the upstream east arch. Pat shepherded us through the right arch. The next bridge is Abbey Bridge, this is a wide modern bridge, just over the turn, where the Abbey River turns right (west). Looking back from under Abbey Bridge we could see the restored entrance lock to the disused Park Canal, this used to connect up to the bottom section of the Shannon.
The bridges now are close together, next is Baal's Bridge, then Mathew Bridge. Between Baal's and Mathew Bridges are some floating pontoon visitor moorings, alongside George's Quay, the north side. Beyond Mathew Bridge is the new blue footbridge and the half tide weir, this now has a floating pontoon, to deflect wayward boats off the weir! As soon as we were past the blue footbridge, the navigation course turns a sharp left (south), running along side the half tide weir, which is marked by a series of yellow buoys. To the left of the weir (east) are the pontoon Custom House Moorings.
We had checked our speed to nearly standstill and put the bow of Earnest in the slack water. The current took the stern round and we then moored up on the long hammerhead of the pontoons, nicely positioned to go back up (12:35).
If the current is running faster, it is better to go right down to Sarsfield
Lock, wind there, then come back against the flow to find a mooring. After checking that the key card worked OK we chilled out. Neil filled Earnest with water, Brian arranged a lift back home and the rest of the crew investigated Limerick. That night it was peeing with rain, so we went to the nearest pub /
restaurant we could find, the Locke Bar on Georges Quay.
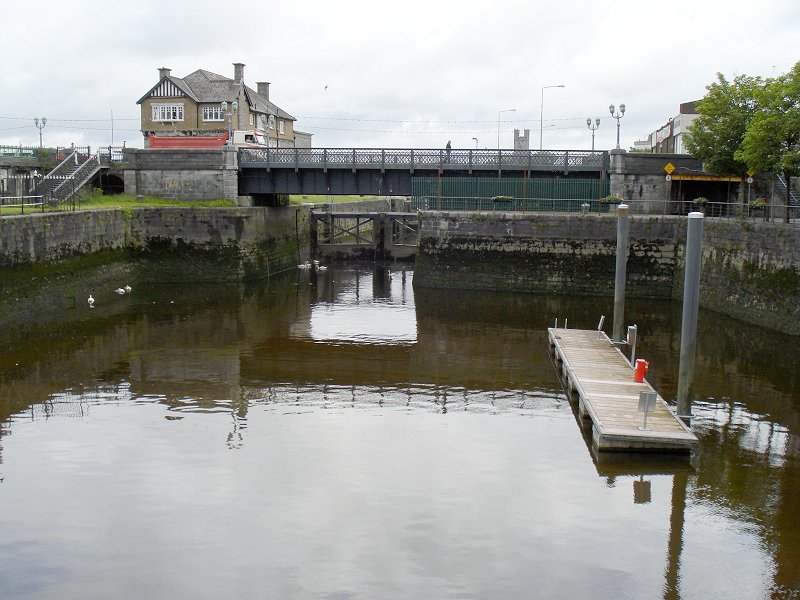
Cover shot from Rolt's "Green and Silver". Looking up from the old
Limerick - Killaloe Canal Lock in Killaloe.
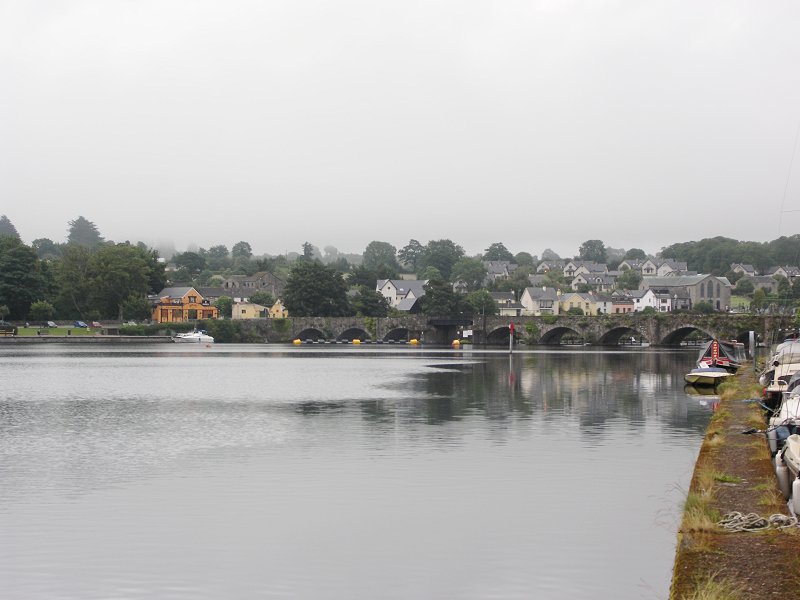
Killaloe Bridge.

Lining up for Killaloe Bridge, start of the new Limerick - Killaloe Waterway.

Killaloe Bridge, start of the new Limerick - Killaloe Waterway.

Looking back at Killaloe Bridge. Limerick - Killaloe Waterway.

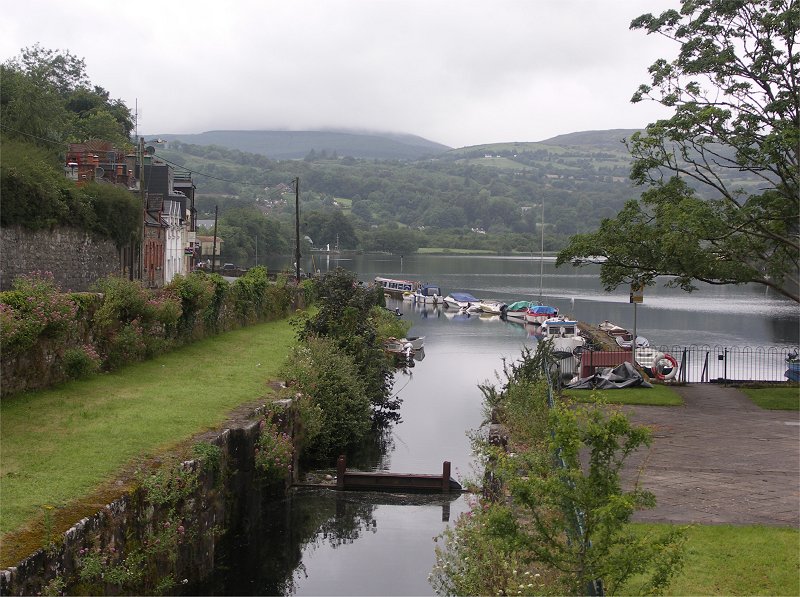
Looking back at Killaloe Bridge, the old canal and cathedral. Limerick -
Killaloe Waterway.

Looking back at Killaloe / Ballina. Limerick - Killaloe Waterway.
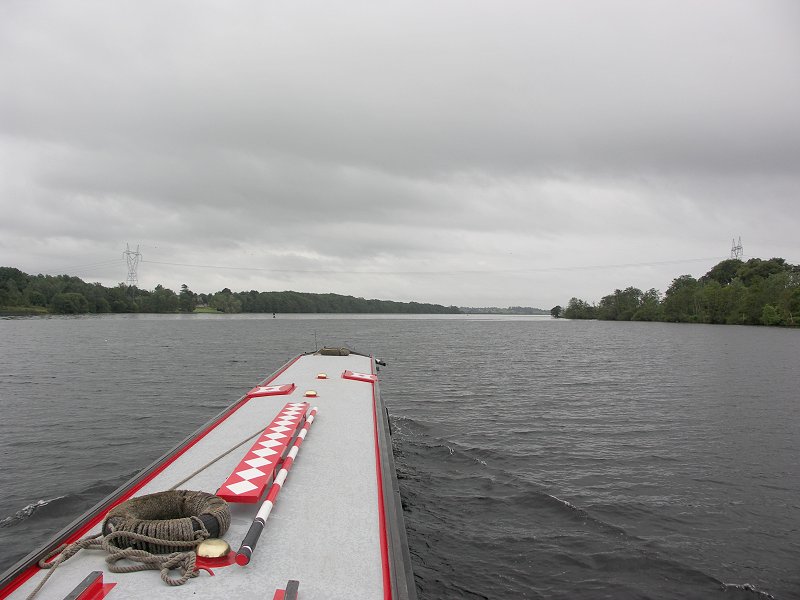
Heading out into the Lower Lake. Limerick - Killaloe Waterway.

Looking back up the Lower Lake. Limerick - Killaloe Waterway.

Looking down at Parteen Villa Weir. Limerick - Killaloe Waterway.

Parteen Villa Weir. The section to the left lets residual flow down the River
Shannon, whereas the section to the right lets water down the Headrace to the
power station. The guillotine that is up is the boat pass, readied for our
booked passage. Limerick - Killaloe Waterway.
Headrace Weir. Limerick - Killaloe Waterway.

Headrace Weir boat pass. Limerick - Killaloe Waterway.

Headrace Weir. Limerick - Killaloe Waterway.

Looking across to the Parteen Weir. Limerick - Killaloe Waterway.

We have just passed through the Headrace Weir boat pass. Limerick - Killaloe
Waterway.

Looking back at the Headrace Weir. Limerick - Killaloe Waterway.

Ardnacrusha Dam Headrace. Limerick - Killaloe Waterway.

Looking back at the Headrace Weir. Limerick - Killaloe Waterway.

O'Brien's Bridge. Ardnacrusha Dam Headrace. Limerick - Killaloe Waterway.

Ardnacrusha Dam Headrace. Limerick - Killaloe Waterway.

Eel nets and Cloonlara Bridge. Ardnacrusha Dam Headrace. Limerick - Killaloe
Waterway.

Eel nets and Cloonlara Bridge. Ardnacrusha Dam Headrace. Limerick - Killaloe
Waterway.
Eel nets and Cloonlara Bridge. Ardnacrusha Dam Headrace. Limerick - Killaloe
Waterway.

Ardnacrusha Dam Headrace. Limerick - Killaloe Waterway.

Blackwater Bridge and Ardnacrusha Dam. Headrace. Limerick - Killaloe Waterway.

Ardnacrusha Dam, lock to the left. Headrace. Limerick - Killaloe Waterway.

Ardnacrusha Dam Lock. Headrace. Limerick - Killaloe Waterway.

We are penned in the top chamber of the Ardnacrusha Dam Lock. Limerick -
Killaloe Waterway.

Top chamber of the Ardnacrusha Dam Lock. Limerick - Killaloe Waterway.

Top chamber of the Ardnacrusha Dam Lock. Cill and top guillotine. Limerick
- Killaloe Waterway.

Top chamber of the Ardnacrusha Dam Lock. Cill and top guillotine. Brian
ropes down from the side bollards. Limerick - Killaloe Waterway.

Top chamber of the Ardnacrusha Dam Lock. Safety ladder and bollards.
Limerick - Killaloe Waterway.

Top chamber of the Ardnacrusha Dam Lock. Centre guillotine gate is being
raised. Limerick - Killaloe Waterway.
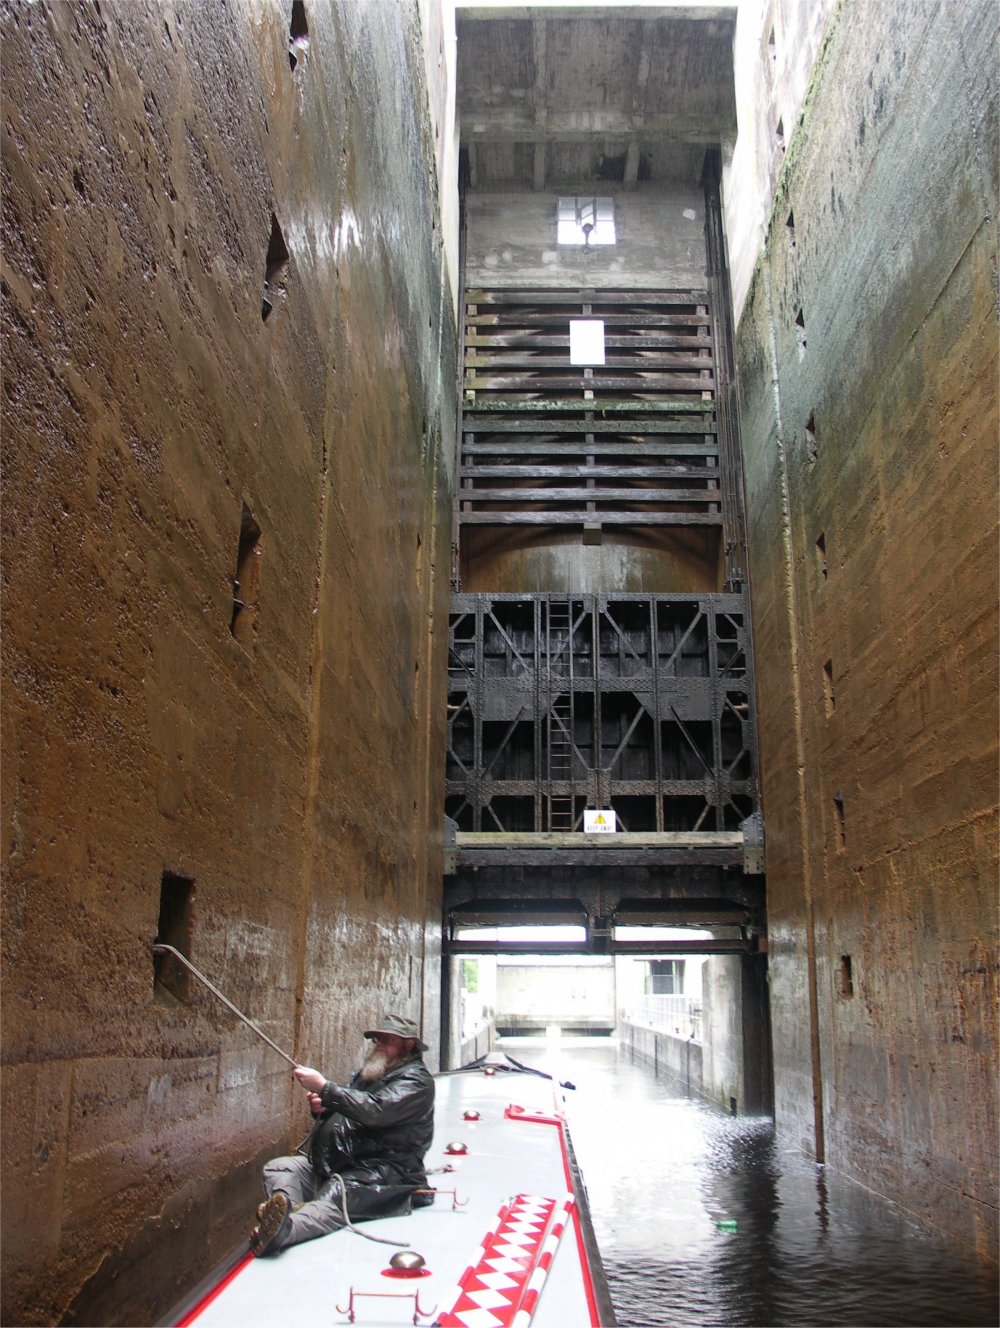
Top chamber of the Ardnacrusha Dam Lock. Centre guillotine gate is raised.
Limerick - Killaloe Waterway.

Bottom chamber of the Ardnacrusha Dam Lock. Centre guillotine gate is raised.
Limerick - Killaloe Waterway.

Looking back at the top chamber of the Ardnacrusha Dam Lock. Centre guillotine
gate is raised. Limerick - Killaloe Waterway.

Waiting in the bottom chamber of the Ardnacrusha Dam Lock. Limerick - Killaloe
Waterway.

Looking across at the generator hall from the Ardnacrusha Dam Lock.
Limerick - Killaloe Waterway.

Looking across at the generator hall and turbine pipes from the
Ardnacrusha Dam Lock. Limerick - Killaloe Waterway.

Looking up at the upper chamber. Ardnacrusha Dam Lock. Limerick - Killaloe
Waterway.

Looking up at the upper chamber. Ardnacrusha Dam Lock. Limerick - Killaloe
Waterway.

View of the empty upper chamber. Ardnacrusha Dam Lock. Limerick - Killaloe
Waterway.

Looking down at Earnest in the lower chamber, from the upper chamber control
point. Ardnacrusha Dam Lock. Limerick - Killaloe Waterway.

Looking down at Earnest in the lower chamber, from the upper chamber control
point. Ardnacrusha Dam Lock. Limerick - Killaloe Waterway.

Not many locks have a lift! Ardnacrusha Dam. Limerick - Killaloe Waterway.

Not many locks have a lift!
Ardnacrusha Dam. Limerick - Killaloe Waterway.

Looking down at the generator hall and Tailrace, only one turbine running.
Ardnacrusha Dam. Limerick - Killaloe Waterway.
Looking across the dam at the fish ladder (the tower structure) and the bottom
lock chamber. Ardnacrusha Dam. Limerick - Killaloe Waterway.

Ready to start descending the lower chamber. Ardnacrusha Dam Lock. Limerick -
Killaloe Waterway.

Ready to start descending the lower chamber. Ardnacrusha Dam Lock. Limerick -
Killaloe Waterway.

Descending the lower chamber. Ardnacrusha Dam Lock. Limerick - Killaloe
Waterway.

Descending the lower chamber. Ardnacrusha Dam Lock. Limerick - Killaloe
Waterway.

We have descended the lower chamber, the guillotine is up, ready to leave.
Ardnacrusha Dam Lock. Limerick - Killaloe Waterway.

Ardnacrusha Dam Lock approach channel, the waiting pontoon. Limerick - Killaloe
Waterway.

Looking back up at the Ardnacrusha Dam Lock. Limerick - Killaloe Waterway.

Looking back up at the Ardnacrusha Dam Lock and waiting pontoon. Limerick -
Killaloe Waterway.

We have just exited the Ardnacrusha Dam Lock lower approach channel and are in
the Tailrace. Limerick - Killaloe Waterway.

Looking back up the Tailrace. Limerick - Killaloe Waterway.

Parteen Bridge. Limerick - Killaloe Waterway.

Looking back up the Tailrace. Limerick - Killaloe Waterway.

The end of the Tailrace. Limerick - Killaloe Waterway.

Looking up the un-navigable River Shannon. Limerick - Killaloe Waterway.

Pat Lysight comes out in his Dory to guide us through and show us the ropes.
Limerick - Killaloe Waterway.

We are on the Shannon section, approaching the railway bridge. Limerick -
Killaloe Waterway.

Shannon section, railway bridge waiting pontoon and air gauge. Limerick -
Killaloe Waterway.

Shannon section, the railway bridge. Limerick - Killaloe Waterway.

Shannon section, passing under the railway bridge and lining up for the Abbey
River (between markers). Limerick - Killaloe Waterway.

Looking back from the top of Abbey River at the entrance markers and the railway
bridge. Limerick - Killaloe Waterway.

Abbey River, O'Dwyer's Bridge. Limerick. Limerick - Killaloe Waterway.

Looking back at O'Dwyer's Bridge. Work going on under the centre arch. Abbey
River. Limerick. Limerick - Killaloe Waterway.

Abbey River. Limerick. Limerick - Killaloe Waterway.
Abbey Bridge. Abbey River. Limerick. Limerick - Killaloe Waterway.

Abbey Bridge, with Baal's Bridge beyond. Abbey River. Limerick. Limerick -
Killaloe Waterway.

Looking back up from Abbey Bridge, the under restoration Park Canal enters
through this restored lock. Abbey River. Limerick. Limerick - Killaloe Waterway.

Baal's Bridge. Abbey River. Limerick. Limerick - Killaloe Waterway.

Looking back at Baal's Bridge. Abbey River. Limerick. Limerick - Killaloe
Waterway.

Mathew Bridge. Note the "deflector" pontoon beyond to stop boats
running over the side weir! Abbey River. Limerick. Limerick - Killaloe
Waterway.

Looking back at the visitor mooring pontoons between Mathew and Baal's Bridges.
Abbey River. Limerick. Limerick - Killaloe Waterway.

Mathew Bridge. Abbey River. Limerick. Limerick - Killaloe Waterway.

Mathew Bridge. The new footbridge beyond. Abbey River. Limerick. Limerick -
Killaloe Waterway.

The new footbridge. Abbey River. Limerick. Limerick - Killaloe Waterway.

Once through the new footbridge, the Custom House visitor moorings and
protection pontoon can be seen. Abbey River. Limerick. Limerick - Killaloe
Waterway.

Earnest at rest on the Custom House visitor moorings. Limerick.

Looking up the tidal Shannon from the Custom House wharf. The Curragour Falls
and Thromond Bridge are in view. Limerick.

Looking down the tidal Shannon from the Custom House wharf at the entrance to
Sarsfield Lock and Sarsfield Bridge. The line of yellow buoys mark the half tide
weir. Limerick.

Looking up the the Abbey River from Mathew Bridge at low water. Limerick.
Limerick - Killaloe Waterway.

Looking up the tidal Shannon from the Custom House wharf. The half tide weir,
the Curragour Falls, Limerick Castle and Thromond Bridge are in view. Limerick

Earnest at rest on the Custom House visitor moorings. Limerick.
Earnest at rest on the Custom House visitor moorings. Limerick.

The Custom House. Limerick.

Sarsfield Lock and Sarsfield Bridge. The line of yellow buoys mark the half tide
weir. Limerick.

Sarsfield half tide Lock. Limerick.

Sarsfield half tide Lock. Limerick.

Sarsfield half tide Lock. The swing bridge is now fixed and craft have to enter
at low water. Limerick.

Sarsfield Bridge. Limerick.

The Custom House moorings and half tide weir from Sarsfield Bridge. Limerick.

The Custom House moorings and half tide weir from Sarsfield Bridge. Limerick.

The waiting pontoon and outer harbour below Sarsfield Lock. Limerick.
The waiting pontoon, Sarsfield Bridge and lock from the outer harbour. Limerick.
Home Page | "Earnest" | "Beatty" | Canal Restoration