|
The Tuesday Night Club Official Web Site |
The Tuesday Night Club on Tour
Tour 2003
12 - Spike Island, West Bank, Widnes to Liverpool Docks. Sankey Canal, Tidal Mersey Estuary and Liverpool Docks.
Tuesday 1st July 2003
That morning John Chapman programmed his GPS with all the latest waypoint info. After persuading John the Spike Island Locky that we REALLY did want
to leave as soon as there was enough water, we were eventually locked out at 12:50, some hour before high water. Mersey Rescue were about in a small RIB,
trying to catch a manless dinghy. After doing this they contacted us and said they were glad to shadow us for a while, as they were concerned we had
enough power to get through the Runcorn Bridges. They followed us to beyond Hale Head, after this a rather larger RIB took over to shadow us
from Liverpool Marina.
There was fairly flat water in one of the ebb channels, round West Bank...BUT as soon as we came round to the bridges, it was like hitting a
brick wall. Ian kept some in reserve and left Earnest at 2200 revs. It was painfully slow just before the bridges, but strangely we took off through
the arches and started to make solid progress. The fall in water level from the upstream end of the piers to the downstream end could clearly bee seen.
Below the bridges there was the dog leg to do to get in the channel, but Frank said it was more important to make this gentle as we wanted complete
control of our position. We were now managing around 4MPH against the flood and started making progress to Hale Head, which we had to skirt round, going
more out to the centre of the estuary, before making an arch round to our next way point, the sticky out Liverpool light gantry.
It was just before this that the prop shaft noise started.......the ebb had come almost immediately and we were OFF!
Just as well as Neil had prepared Earnest for maximum salty travels.
Periscope exhaust was attached, Mikuni bung in and the front battened down. It now began to get a bit choppy, a nasty wind over tide short sea, causing
a fair bit of bottom plate banging.......Neil then dumped the last of the water to further lighten the bow and stop it slamming around in the not too
thick stainless steel water tank.
The next section was the most dodgy, going over a bit indeterminate channel and skirting some spoil ground before coming round Garston Rocks,
then finally into the deep water, buoyed Garston (north) channel. All went well and by the time we were in the Garston Channel we were really moving.
John mentioned that we were now bombing along at around 14.5MPH. The Liverpool water front certainly shot past. Only one Mersey Ferry was out,
that had just departed and was doing the "long" trip, going down to Liverpool Docks, before turning to go upstream on the Cheshire side.
The slamming continued to around the Pier head, then subsided. This was due to the NW (wind over Spring tide) Force 4 now not having much flood to argue
with. Some confusion followed when we arrived at Liverpool Docks, Langton (Small??!!) Lock (15:30), probably due to John Chapman insisting on using
his known naff VHF. Our Mersey Rescue "shadow" managed to raise the somewhat laid back Langton Lockies and we were eventually allowed in after a tug,
after aimlessly wandering around in the now gentle swell for nearly half an hour! ....we might as well taken a trip down to New Brighton.
The locky used the outer "short" section of the lock, the gates being huge 40ft wide tanks
of water, that slide in from the side. No ropes were taken and we just clung from the one thing we could - the safety ladder. On the plus side the lock
was very gentle and we were soon somewhat near the top - just as well we were near the ladder. Ian and John immediately jumped ship for the
supposedly waiting taxi and left Neil to the mercy of the rather confused Mersey Docks and Harbour Board "booking" system. The Lockies eventually
faxed yet ANOTHER insurance certificate to the office and got back a different locking fee (a touch cheaper at 36.79 quid, rather than the 37.50
quid advised!)
Finally at 16:45 we set of for a quick 15 minute journey up through the docks to our allocated "berth" in Collingwood Dock, just below Stanley
Dock and the teeny weeny hole in the wall, where the Stanley Dock Locks start behind. The only swing bridge across the upper docks was swung by
remote, by the Langton Locky watching on CCTV.
We were moored up at 17:00 and soon shut up shop, to attempt to find a pub, or something in the
Liverpool docklands wastelands. We walked up towards the Leeds & Liverpool Canal
and we happened upon a modern Chinese Supermarket. Above it was a restaurant, the
"Tai Pan" .....that was packed and VERY good, probably the best Chinese meal I have had in years.

Leaving Spike Island, Sankey Canal.

Leaving Spike Island, Sankey Canal.

Entering Spike Island Lock, West Bank. Sankey Canal.

Neil in pensive mood, entering Spike Island Lock, West Bank. Sankey Canal.

Spike Island Lock, West Bank. Sankey Canal.

About to leave Spike Island Lock and go of into the Tidal Mersey, notice the
silt bar still visible on the right. West Bank. Sankey Canal.

Leaving Spike Island Lock. The inflatable belongs to Mersey River Rescue, which
is trying to capture a lost sailing dingy. West Bank. Sankey Canal.
![]()
Leaving Spike Island. Mersey River Rescue has caught the lost sailing dingy.
West Bank. Tidal River Mersey.

Leaving Spike Island. West Bank. Tidal River Mersey.

Leaving Spike Island. West Bank. Mersey River Rescue is returning the lost
sailing dingy. Tidal River Mersey.

Leaving Spike Island. West Bank. We have now swung into the full force of a
springs flood tide. Fiddler's Ferry power station in the background. Tidal River
Mersey.

Approaching the Runcorn Bridges. Tidal River Mersey. It may took serene, but the
tide is tanking in at 3-4 knots!

Approaching the Runcorn Bridges. Tidal River Mersey. The flood tide was at its
most severe at this point.

Mersey River Rescue shadow us during our slow plod through the Runcorn Bridges.
Tidal River Mersey.
This slipway is being used by Mersey River Rescue. The jetty to the left is the
old Runcorn Transporter Bridge West Bank Dock. Runcorn Bridges, Tidal River
Mersey.

Creeping through the Runcorn Bridges, amazingly at this point we pick up speed.
Tidal River Mersey.

Creeping through the Runcorn Bridges. Tidal River Mersey.

Creeping through the Runcorn Bridges. Mersey River Rescue keep watch. Tidal
River Mersey.

Through the Runcorn Bridges we skirt the sands, so we were not pushed sideways
on the spoil ground by the bridge piers. Mersey Estuary.

Looking back at the Runcorn Bridges. One hurdle out of the way, now all we had
to do was chase the flood to at least as far as Hale Head. Mersey Estuary.

Below the Runcorn Bridges. Mersey Estuary.

Hale Head in the distance. Mersey Estuary.
![]()
Looking back at the Runcorn Bridges. Mersey Estuary.

Mersey Estuary.
![]()
Hale Head in the distance and we begin to loose the flood tide. Mersey Estuary.
![]()
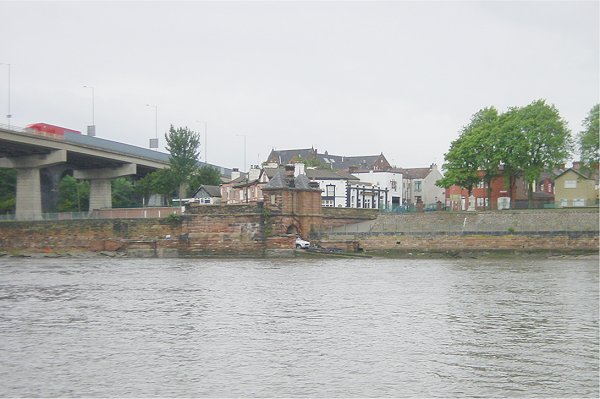
Looking across to Runcorn and Weston Docks on the Manchester Ship Canal. Mersey
Estuary.

Coming in on channel by Liverpool Airport light gantry we pick up the ebb tide,
which starts to argue with the prevailing wind. Mersey Estuary.

Liverpool Airport light gantry. This next section MUST be done around high water
seeing as the channel from here to Garston is virtually none existent. Mersey
Estuary.
![]()
Garston Docks comes into view on the right. Once round Garston Rocks we can come
round into the deep Garston Channel. Mersey Estuary.

Coming round Garston Rocks we are going with the full force of the ebb tide
against the wind (Force 4 North Westerly). Mersey Estuary.

Safe? at last we are in the Garston Channel. Mersey Estuary.

I think this is the steak house place Martin Clark, John Chapman and me tried to
find on our reccy.............ho hum....well we certainly were not going to stop
at that moment for it! Mersey Estuary.

Looking back at Garston. Mersey Estuary.
![]()
Toxteth. Approaching Liverpool Marina. Mersey Estuary.

Looking across to the Tranmere Oil Terminal and Cammell Lairds yard. Here the
channel comes away from the Liverpool side to miss Pucklington Bank. Mersey Estuary.
![]()
Looking across to the Tranmere Oil Terminal and the Cammell Lairds yard. Mersey Estuary.
![]()
Looking down to Liverpool Pierhead. A Mersey Ferry has just left, doing the
longer "cruise" trip between the three ferry ports, Liverpool
Pierhead, Seacombe and Woodside (Birkenhead). Mersey Estuary.

The two Liverpool cathedrals and Liverpool Marina. Mersey Estuary.

The two Liverpool cathedrals and Liverpool Marina. Mersey Estuary.

Approaching Liverpool Pierhead. Mersey Estuary.

Albert Dock. Liverpool. Mersey Estuary.

Liverpool Pierhead. Mersey Estuary.

Looking back at Toxteth and Liverpool Marina. Mersey Estuary.

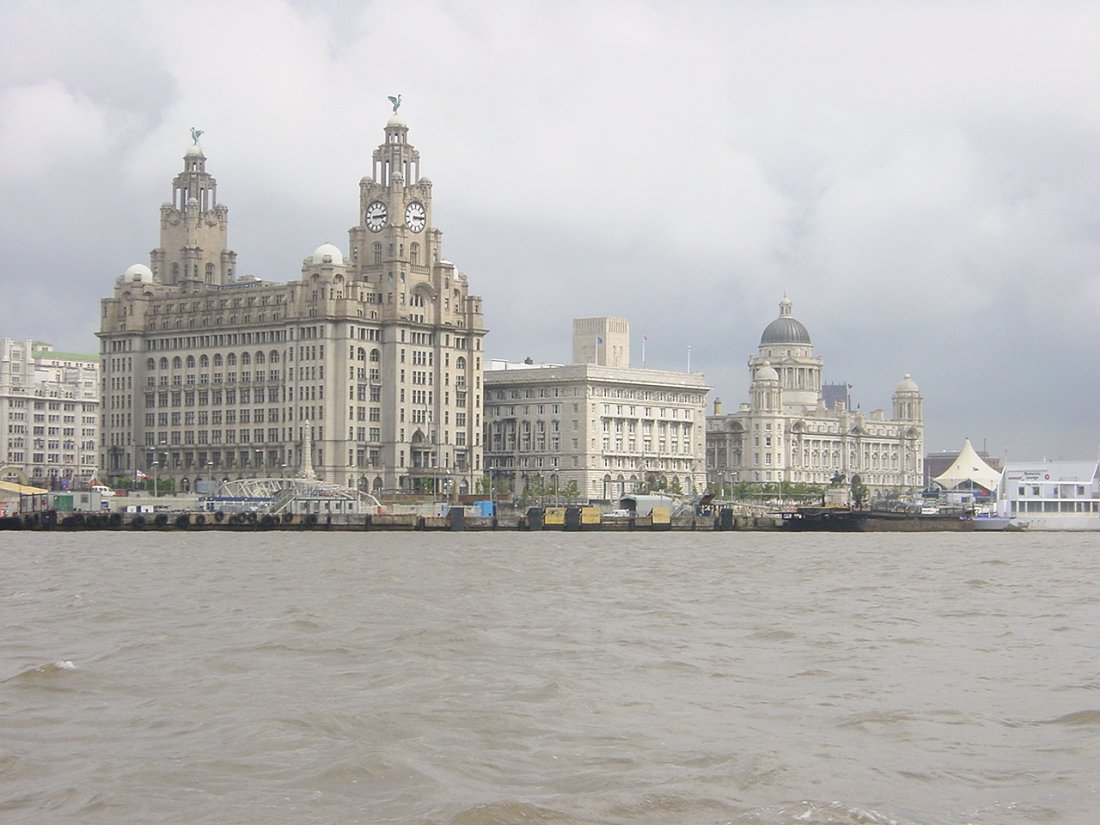
Liverpool Pierhead and the three Graces. The Royal Liver building, Cunard
Building and The Offices of the Mersey Docks and Harbour Board. Mersey
Estuary.

Liverpool Pierhead and The Three Graces. Mersey Estuary.
(Click here for a large image)
![]()
Heading downstream to Langton Lock, the "small" entrance to Liverpool
Docks. Mersey Estuary.

Looking back at Pierhead. Mersey Estuary.

The Mersey Ferry comes back towards Seacombe after its cruise down the estuary.
The towered building is Wallasey Town Hall. Mersey Estuary.

The Mersey Rescue RIB from Liverpool Marina shadows us. Passing Victoria Tower
in Salisbury Dock. Mersey Estuary.

Aiming for Langton Lock, Liverpool Docks. Mersey Estuary.

Waiting for Langton Lock, Liverpool Docks. Mersey Estuary.

Langton Lock, Liverpool Docks. The bottom gate slides away to welcome us. Mersey
Estuary.

Langton Lock, Liverpool Docks. This makes the Manchester Ship Canal locks look
SMALL! Mersey Estuary.

Entering Langton Lock, Liverpool Docks. Mersey Estuary.

Langton Lock, Liverpool Docks. No one took our ropes and there was only a single
ladder to hold onto.

Safely in Langton Lock, Liverpool Docks. The outer gate slides into position.

Langton Lock, Liverpool Docks. The Middle (short lock) gate slides away.

We are up in Langton Lock, Liverpool Docks.

Langton Lock, Liverpool Docks.

Ian Clarke and John Chapman jump ship, they have a rush on to get into
Liverpool, to get the train / bus back home. Langton Lock, Liverpool Docks.

Looking back out from Langton Lock. Liverpool Docks.

Langton Lock control block. Liverpool Docks.
![]()
We are on our way to our berth in Collingwood Dock. Langton Dock behind.
Liverpool Docks.

Passing through Brocklebank Dock. Pilot boats and light vessels under repair.
Liverpool Docks.

Brocklebank Dock. Pilot boats. Liverpool Docks.
![]()
Looking back at Brocklebank Dock. Liverpool Docks.

Passing through Canada Dock. Huge scrap metal berth on right. This swing
bridge was the only one working and was controlled from Langton Lock Control
Block by remote. Liverpool Docks.

Looking back at Canada Dock. Liverpool Docks.

The swing bridge shuts behind us. We are now in Huskisson Dock. Liverpool Docks.

John Harker's berth in Huskisson Dock. Liverpool Docks.
![]()
Looking up Branch No1 of Huskisson Dock. Liverpool Docks.
![]()
The preserved large yacht Libertate in Sandon Half Tide Dock. Liverpool Docks.

Getting up the really derelict end of the Docks - We are entering Bramley Moore
Dock, Nelson Dock beyond. Victoria Tower stands at the end of Salisbury
Dock. Liverpool Docks.

Bramley Moore dock behind. Liverpool Docks.

Entering Salisbury Dock, here we swing left and enter Collingwood Dock, where
our overnight berth was situated. Liverpool Docks.

Swinging into Collingwood Dock. Stanley Dock is beyond the lift bridge. The
magnificent Tobacco warehouse towers over the scene. Our berth is just left
round the corner. Liverpool Docks.

Looking through Collingwood Dock to Stanley Dock. Liverpool Docks.

Our berth in Collingwood Dock. Liverpool Docks. Frank Smith looks relieved to be
on dry land! Peter Wright and Martin Clark look on. Liverpool Docks.

Our berth in Collingwood Dock. Liverpool Docks. Frank Smith prepares to leave
for his lift back to West Bank. Liverpool Docks.

Looking across Salisbury Dock to Nelson Dock. Liverpool Docks.

The Tobacco Warehouse dominates the scene. Liverpool Docks.

Stanley Dock beckons us up the Leeds and Liverpool Canal. The tiny entrance at
the dock end, under the swing bridge, is big enough to take a Leeds and
Liverpool short boat. Stanley Docks Branch locks beyond. Liverpool Docks.

The Leeds and Liverpool Canal, from our evening walk. Looking up from Bridge No
E.

The Leeds and Liverpool Canal. Looking towards the end at Eldonian basin at
Bridge No D from Bridge No E.

The junction with the Stanley Docks Branch is just past the second lamp post.
The bridge beyond is the new Bridge No C into Eldonian Basin. Leeds and
Liverpool Canal.

Stanley Docks Branch and locks. Leeds and Liverpool Canal.

Stanley Docks Branch and locks. Leeds and Liverpool Canal.

Stanley Docks Branch and locks. Leeds and Liverpool Canal.

Stanley Docks Branch and locks. Leeds and Liverpool Canal.

Stanley Docks Branch and locks. Leeds and Liverpool Canal.

Stanley Docks Branch and locks. Leeds and Liverpool Canal.

Stanley Dock. Liverpool Docks.

Stanley Dock. Liverpool Docks.
Home Page | "Earnest" | "Beatty" | Canal Restoration